

Classical Orbital Elements and the State Vector#
As we saw in the last section, we can replace the six elements in the state vector with six orbital elements which describe the orbit. If the position and velocity vectors are known, we need to be able to convert them to the classical orbital elements. Likewise, if we have six independent orbital elements, we might want to convert them into a state vector.
State Vector → Orbital Elements#
Let’s assume that we are given the state vector, composed of \(\vector{r}\) and \(\vector{v}\) at some time \(t_0\). We would like to determine the six classical orbital elements:
\(h\)
\(e\)
\(i\)
\(\Omega\)
\(\omega\)
\(\nu\)
As we discussed previously, this set of six elements is not unique; for instance, the orbital angular momentum \(h\) can be replaced by the semi-major axis distance, \(a\). Nonetheless, this set of six is a convenient set to calculate and other elements can be determined from this set.
Step 1—Position and Velocity Magnitudes#
The first step in the conversion is to calculate \(r\), \(v\), \(v_r\), and \(v_{\perp}\). Recall that the radial velocity is the projection of the velocity vector onto the unit radial vector:
and we can subsequently find the azimuthal velocity by the Pythagorean theorem:
import numpy as np

r_vec = np.array((1_000, 5_000, 7_000))  # km
v_vec = np.array((3.0, 4.0, 5.0))  # km/s
mu = 3.986e5  # km^3/s^2

r = np.linalg.norm(r_vec)
v = np.linalg.norm(v_vec)
v_r = np.dot(r_vec / r, v_vec)
v_p = np.sqrt(v**2 - v_r**2)
r_vec = [1000, 5000, 7000]; % km
v_vec = [3.0, 4.0, 5.0]; % km/s
mu = 3.986E5; % km^3/s^2

r = norm(r_vec);
v = norm(v_vec);
v_r = dot(r_vec/r, v_vec);
v_p = sqrt(v^2 - v_r^2);
For this example, we find \(r =\) 8660.254 km, \(v =\) 7.071 km/s, \(v_r =\) 6.697 km/s, and \(v_{\perp} =\) 2.269 km/s.
Step 2—Orbital Angular Momentum#
Next, we need to calculate the orbital angular momentum. By definition, \(\vector{h} = \vector{r}\cross\vector{v}\). We also need the magnitude of the angular momentum.
h_vec = np.cross(r_vec, v_vec)
h = np.linalg.norm(h_vec)
h_vec = cross(r_vec, v_vec);
h = norm(h_vec);
We find \(\vector{h} =\) -3000 \(\uvec{I}\) + 16000 \(\uvec{J}\) - 11000 \(\uvec{K}\) km2/s and \(h =\) 19646.883 km2/s. Notice that the \(Z\) component of the angular momentum is negative. This means the momentum vector is pointing down and the orbit is retrograde. The magnitude of the orbital angular momentum is the first orbital element.
Step 3—Inclination#
Once the angular momentum is calculated, we can calculate the inclination, \(i\). Let’s form a right triangle with one leg as the \(Z\) component of the angular momentum and the hypotenuse as the magnitude of the angular momentum. Then the inclination is the angle adjacent to \(h_Z\) and can be found by the inverse cosine, as shown in Eq. (174).
Since the inclination is restricted to lie between 0° and 180°, we do not need to worry about the quadrant ambiguity inherent in the inverse cosine function.
i = np.arccos(h_vec[2] / h)
i = acos(h_vec(3) / h);
The inclination of this orbit is \(i =\) 124.05°. We know for retrograde orbits, the inclination must be between 90° and 180°, which is the case here. The inclination is the second orbital element.
Step 4—Right Ascension of the Ascending Node#
Next, we will calculate the right ascension of the ascending node. The ascending node is the point on the line of nodes where the spacecraft ascends above the reference plane. Since the line of nodes is defined by the intersection of the orbital plane and the reference plane, it must lie in both planes.
Therefore, the node line is perpendicular to the normal vectors of both the reference plane and the orbital plane. We can find the perpendicular vector by taking the cross product of a vector normal to the reference plane and a vector normal to the orbital plane. For convenience, we choose the \(\uvec{K}\) vector and the \(\vector{h}\) vector, as shown in Eq. (175).
Then, similar to the inclination, we form a right triangle where the \(X\) component of \(\vector{N}\) is one leg and the magnitude of \(\vector{N}\) is the hypotenuse. The right ascension of the ascending node is the angle adjacent to \(N_X\) so it can be found by the inverse cosine, as shown in Eq. (176).
However, unlike the inclination, \(\Omega\) can vary from 0° to 360°, so we need to determine the appropriate quadrant for the resulting angle. We can do this by comparing the sign of the \(Y\) component of \(\vector{N}\).
If \(N_Y \geq 0\), then \(\vector{N}\) must be pointing to the first or second quadrant and 0° ≤ \(\Omega\) ≤ 180°. If \(N_Y < 0\), then \(\vector{N}\) must be pointing to the third or fourth quadrant, so 180° < \(\Omega\) < 360°. We can express this fully with the conditions in Eq. (177).
K = np.array((0, 0, 1))
N_vec = np.cross(K, h_vec)
N = np.linalg.norm(N_vec)
Omega = 2 * np.pi - np.arccos(N_vec[0] / N)
K = [0, 0, 1];
N_vec = cross(K, h_vec);
N = norm(N_vec);
Omega = 2 * pi - acos(N_vec(1)/N);
For this problem, we find \(N_Y =\) -3000, so the right ascension of the ascending node is in the third or fourth quadrant. Then, we find \(\Omega =\) 190.62°. The right ascension of the ascending node is the third orbital element.
Step 5—Eccentricity#
The fourth orbital element is the eccentricity. Way back in Eq. (112), we found the eccentricity vector as the constant of integration of the equation of motion. Repeating the equation here:
If you’re using a computer to do calculations, this form is the simplest to use. However, we can replace the cross product and simplify Eq. (112) somewhat.
Eq. (178) is useful if you’re doing calculations out by hand, since you don’t have to do any cross products, only scalar multiplications of the vectors.
The magnitude of the eccentricity can be found in the usual method programmatically, or with a form simplified from Eq. (178), as shown in Eq. (179).
Again, Eq. (179) is useful for hand calculations.
K = np.array((0, 0, 1))
N_vec = np.cross(K, h_vec)
N = np.linalg.norm(N_vec)
Omega = 2 * np.pi - np.arccos(N_vec[0] / N)

# [section-5]
e_vec = np.cross(v_vec, h_vec) / mu - r_vec / r
e = np.linalg.norm(e_vec)
K = [0, 0, 1];
N_vec = cross(K, h_vec);
N = norm(N_vec);
Omega = 2 * pi - acos(N_vec(1)/N);

% [section-5]
e_vec = cross(v_vec, h_vec) / mu - r_vec / r;
e = norm(e_vec);
The eccentricity of this orbit is \(e =\) 0.948, so the orbit is a very eccentric ellipse.
Step 6—Argument of Periapsis#
The last two orbital elements are found using the algebraic definition of the dot product, Eq. (180).
where \(\vector{A}\) and \(\vector{B}\) are arbitrary vectors, \(A\) and \(B\) are their magnitudes, and \(\theta\) is the angle between the vectors.
By definition, the eccentricity vector points towards periapsis. Moreover, the argument of periapsis is the angle from the ascending node to periapsis following around the orbit. In other words, the argument of periapsis is the angle between the eccentricity vector \(\vector{e}\) and the node line \(\vector{N}\). We can solve for \(\omega\) by using Eq. (180).
Like the right ascension of the ascending node, the argument of periapsis can vary from 0° to 360°. To determine the appropriate quadrant, we can inspect the sign of the \(Z\) component of \(\vector{e}\).
If \(e_Z \geq 0\), then \(\vector{e}\) points up and periapsis must be between the ascending node and descending node, so 0° ≤ \(\omega\) ≤ 180°. On the other hand, if \(e_Z < 0\), then periapsis must be between the descending and ascending nodes, and 180° < \(\omega\) < 360°. We can express this fully with the conditions in Eq. (182).
omega = 2 * np.pi - np.arccos(np.dot(N_vec, e_vec) / (N * e))
omega = 2 * pi - acos(dot(N_vec, e_vec) / (N * e));
For this problem, we find \(e_Z =\) -0.6578, so the argument of periapsis is in the third or fourth quadrant. Then, we find \(\omega =\) 303.09°. The argument of periapsis is the fifth orbital element.
Step 7—True Anomaly#
The final orbital element is the true anomaly, \(\nu\). The true anomaly is the angle from the apse line to the position vector. In other words, it is the angle between \(\vector{e}\) and \(\vector{r}\). We can solve for \(\nu\) by using Eq. (180).
Like the right ascension of the ascending node, the argument of periapsis can vary from 0° to 360°. To determine the appropriate quadrant, we can inspect the sign of the radial component of the velocity, \(v_r\).
If \(v_r \geq 0\), then \(\vector{r}\) is increasing in length and the spacecraft must be flying away from periapsis, so 0° ≤ \(\nu\) < 180°. On the other hand, if \(v_r < 0\), then \(\vector{r}\) must be getting shorter and the spacecraft must be flying towards periapsis, such that 180° ≤ \(\nu\) < 360°. We can express this fully with the conditions in Eq. (184).
nu = np.arccos(np.dot(r_vec / r, e_vec / e))
nu = acos(dot(e_vec, r_vec) / (e * r));
For this problem, we find \(v_r =\) 6.6973 km/s, so the argument of periapsis is in the first or second quadrant. Then, we find \(\nu =\) 159.61°. The true anomaly is the sixth and final orbital element.
Orbital Elements → State Vector#
The algorithm to convert from the orbital elements back to the state vector is somewhat more involved, so we do not include the complete derivation here. There are two steps in this algorithm:
Use the orbital elements \(e\), \(\nu\), and \(h\) to represent \(\vector{r}\) and \(\vector{v}\) in the perifocal frame
Rotate the perifocal frame so that the axes align with the inertial axes using the orbital elements \(\Omega\), \(\omega\), and \(i\).
The first step is rather simple, but the derivation of the second step requires a long digression on the topic of coordinate transformations. So, we’ll skip the derivation and get right to the point.
Step 1—Transform to Perifocal Frame#
Remember that the perifocal frame is defined in the orbital plane with the unit vectors \(\uvec{p}\), \(\uvec{q}\), and \(\uvec{w}\), as shown in Fig. 42. The position and velocity components in the perifocal frame are given by Eq. (167) and Eq. (170), respectively.
r_w = h**2 / mu / (1 + e * np.cos(nu)) * np.array((np.cos(nu), np.sin(nu), 0))
v_w = mu / h * np.array((-np.sin(nu), e + np.cos(nu), 0))
r_w = h^2 / mu / (1 + e * cos(nu)) .* [cos(nu) sin(nu) 0];
v_w = mu / h .* [-sin(nu) e + cos(nu) 0];
For this example, we find \(\vector{r}_{\omega} =\) -8117.7120 \(\uvec{p}\) + 3017.0767 \(\uvec{q}\) km and \(\vector{v}_{\omega} =\) -7.0680 \(\uvec{p}\) + 0.2067 \(\uvec{q}\) km/s.
Step 2—Rotate the Perifocal Frame#
The second step of this algorithm is to apply the set of coordinate transformations that converts the perifocal frame into the inertial frame. It turns out that a set of three rotations applied sequentially will accomplish this goal. These steps are shown in Fig. 47.
Rotate around the \(\uvec{w}\) axis until the \(\uvec{p}\) axis is aligned with the node line
Rotate around the node line until the \(\uvec{w}\) axis is aligned with the \(Z\) axis
Rotate around the \(Z\) axis until the \(\uvec{p}\) axis is aligned with the \(X\) axis
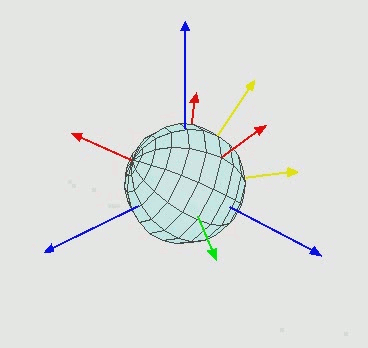
Fig. 47 The sequence of rotations to convert from the perifocal frame to the inertial frame. Adapted from Juansempere, CC BY-SA 4.0, via Wikimedia Commons.#
By definition, the \(\uvec{p}\) vector points towards periapsis. Therefore, it is also aligned with the eccentricity vector. If we rotate the frame around the \(\uvec{w}\) axis until \(\uvec{p}\) is aligned with the node line, this will align \(\vector{e}\) with \(\vector{N}\). This rotation is the negative of the argument of periapsis, \(\omega\).
At this point, the node line and the eccentricity are aligned. Rotating around the node line changes the inclination of the orbit. When \(\uvec{w}\) is aligned with the \(Z\) axis, then the inclination, \(i\), has been accounted for.
The last step is to account for the right ascension of the ascending node. Since \(\uvec{p}\) is now aligned with the node line, we can rotate around the \(Z\) axis to turn the orbital plane until it aligns with the \(X\) axis. This is the negative of the right ascension of the ascending node.
These three angles (\(\omega\), \(i\), and \(\Omega\)) are called Euler angles. Transformations based on the Euler angles are well known and can be calculated in many ways. Here, we’ll use a computing environment to simplify the calculations.
from scipy.spatial.transform import Rotation

R = Rotation.from_euler("ZXZ", [-omega, -i, -Omega])
r_rot = r_w @ R.as_matrix()
v_rot = v_w @ R.as_matrix()
In Python, the SciPy library includes a class to automatically compute the rotation matrix. The class takes the three angles and the axes about which the rotations should be done. In this case, our rotations are around the \(\uvec{w}\) axis (the \(z\) axis of the perifocal frame), the \(x\) axis that is present after the first rotation, and finally, the \(z\) axis which is present after the second rotation.
Notice that the rotation is right-handed by default, positive clockwise. Since we are reversing the rotations, the angles all have to be negative.
To actually perform the rotation, we need to multiply the position and velocity vectors in the perifocal frame by the rotation matrix. The @ symbol in Python performs matrix multiplication, instead of scalar multiplication.
R1 = [cos(-omega) -sin(-omega) 0; sin(-omega) cos(-omega) 0; 0 0 1];
R2 = [1 0 0; 0 cos(-i) -sin(-i); 0 sin(-i) cos(-i)];
R3 = [cos(-Omega) -sin(-Omega) 0; sin(-Omega) cos(-Omega) 0; 0 0 1];
r_rot = r_w * R1 * R2 * R3;
v_rot = v_w * R1 * R2 * R3;
In Matlab, there is no built-in way to compute rotation matrices. Instead, the easiest step is to compose the rotation matrices for each direction and multiply the position and velocity vectors by the matrices.
The order that the multiplication occurs is important! This is because the rotation has to occur first around the \(\uvec{w}\) axis, then about the new \(x\) axis generated by the first rotation, and finally around the new \(z\) axis created by the second rotation. If the rotations are specified in a different order, you will not get the right result.
In addition, notice that the angles must be specified as negative, since we are reversing the rotation from the perifocal frame to the inertial frame.
In the end, we find \(\vector{r} =\) 1000 \(\uvec{I}\) + 5000 \(\uvec{J}\) + 7000 \(\uvec{K}\) km and \(\vector{v} =\) 3 \(\uvec{I}\) + 4 \(\uvec{J}\) + 5 \(\uvec{K}\) km/s. This is exactly the same as the initial condition, showing that we did the conversion correctly.